7.3. 8SMC5 Ethernet
7.3.1. General information
Sometimes there is a need for remote control of the device, when it is not always convenient to place a computer next to the device or sometimes it is simply impossible. 8SMC5 controller with Ethernet support is a device that allows the end user to remotely interact with the motor controller over an Ethernet network. In addition, the functionality of multi-user access to a single device appears.
If you encounter problems connecting the device via Ethernet, please visit the pages Can’t detect the device via Ethernet or Device loses Ethernet connection.
7.3.2. Connection Options
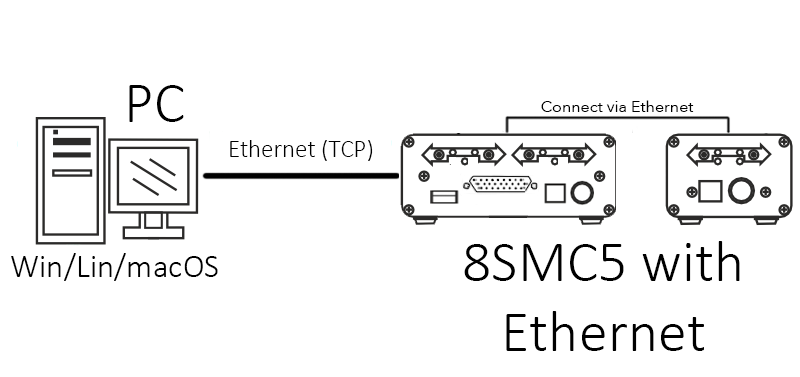
The figures below show various examples of 8SMC5 controller connection schemes via Ethernet. Note that in the two diagrams, motor control will only be available from the PC directly connected to the 8SMC5. In cases where a local network is present, direct connection of the controller to the PC may be chosen to eliminate even the slightest possibility of simultaneous motor control from another PC on the network, which could disrupt an active technological process.
Note
The examples described in this chapter are also relevant for multi-axis controllers connected to a circuit using an Ethernet cable.
For example, the 8SMC5-ETH-B8-B9 three-axis controller consists of two controllers (uniaxial and biaxial), which can either be connected to each other by an Ethernet cable, or they can simply be on the same network. In both cases, the controllers will be visible on the network and available for operation.
The 8SMC5 Ethernet controller can be connected to a computer or network in various ways. Depending on the network configuration and available resources, several connection options are possible.
This section describes the following connection scenarios:
- Connection to a computer without DHCP
- Connection to a computer via LAN with DHCP
- Connection via USB-Ethernet Adapter
- Remote access via VPN
7.3.2.1. Connection to a computer without DHCP
In this scenario, the controller is connected directly to a computer via an Ethernet cable. The computer does not have Internet access, and automatic IP assignment via DHCP is not available.
Connect the controller to the computer using an Ethernet cable;
Check the computer’s IP configuration:
- If the computer is set to obtain an IP address automatically, the controller will wait for a DHCP server response for 45 seconds.
Since no DHCP server is present, the controller will assign itself an IP address in the range
169.254.xxx.xxxwith a subnet mask of255.255.0.0. This allows the controller to be automatically detected. - If the computer has a static IP address, the controller must be manually assigned an IP within the same subnet.
For example, if the PC has the IP
192.168.1.10, the controller should have192.168.1.X, where X is any available address on the network.
- If the computer is set to obtain an IP address automatically, the controller will wait for a DHCP server response for 45 seconds.
Since no DHCP server is present, the controller will assign itself an IP address in the range
Use the Revealer utility to detect the controller on the network (see chapter 7.3.3).
If necessary, change the IP address of the controller. You can do this in the web admin panel of the controller. Use “0000” as your password;
7.3.2.2. Connection to a computer via LAN with DHCP
In this scenario, the computer to which the controller is connected is on the same local network (LAN) and operates via DHCP.
- Connect the controller to a computer (in this case, the computer must have 2 network interfaces) or a local network using an Ethernet cable;
- Wait for your DHCP server to assign an IP address to the controller;
- Using the Revealer utility, find the controller on the network (see chapter 7.3.3).
7.3.2.3. Connection via USB-Ethernet Adapter
If the computer has only one network interface that is already in use for network connection, a USB-Ethernet adapter can be used to connect the controller.
- Connect the controller to a computer using a USB-Ethernet adapter;
- Wait for your DHCP server to assign an IP address to the controller;
- Using the Revealer utility, find the controller on the network (see chapter 7.3.3);
7.3.2.4. Remote access via VPN
If the controller is located in the office and you have to work with it remotely, for example, from another office or home, access can be obtained via a VPN connection.
- Connect the controller to a computer or to a local network;
- Wait for your DHCP server to assign an IP address to the controller;
- Set up a VPN connection;
- Using the Revealer utility, find the controller on the network (see chapter 7.3.3);
7.3.3. Automatic device detection
“Revealer” is a convenient cross-platform utility for searching devices on a local network. It supports the Standa 8Eth1 search protocol. You can download the utility from the software page.
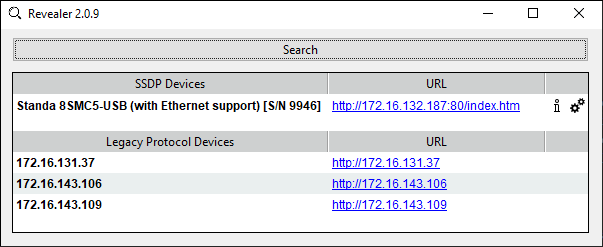
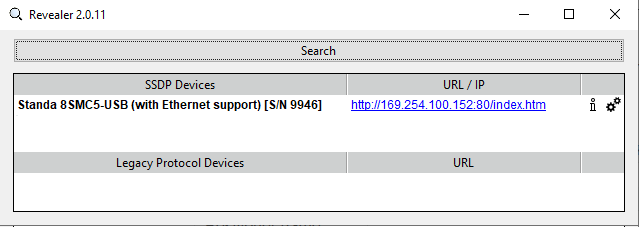
“Revealer” utility interface
The Graphical User Interface of the “Revealer” is a simple one. In order to start search click Search button. After that all 8SMC5 controller with Ethernet support found in your local network will be listed on SSDP Devices panel as clickable links. When clicked, the link opens your defaul system browser and redirects it to Administartion interface web page.
Warning
“Revealer” uses UDP and SSDP broadcasts. When you click on the Search button, both broadcasts are used. For example:
To search 8SMC5 controller with Ethernet support devices, printers, MFU, network drives, video cameras, etc.
uses SSDP broadcasts. You can read more
about SSDP here.
It is important to note that “Revealer” might be unusable in the environments where UDP/SSDP broadcasts are forbidden or unwanted.
7.3.4. Administartion panel
8SMC5 controller with Ethernet support is equipped with web-based Administration interface which enables the end user to control device services and monitor system state.
To get access to the Administration panel, navigate your browser to http://[address] URL (where [address] should be replaced with IP address of the device in your local network and can be obtained with the help of “Revealer” utility). If you are doing this for the first time (or you’ve disabled cookies/password storage in your browser) you’ll need to authenticate yourself.
Hint
The default password is “0000”
7.3.5. Getting started with XILab
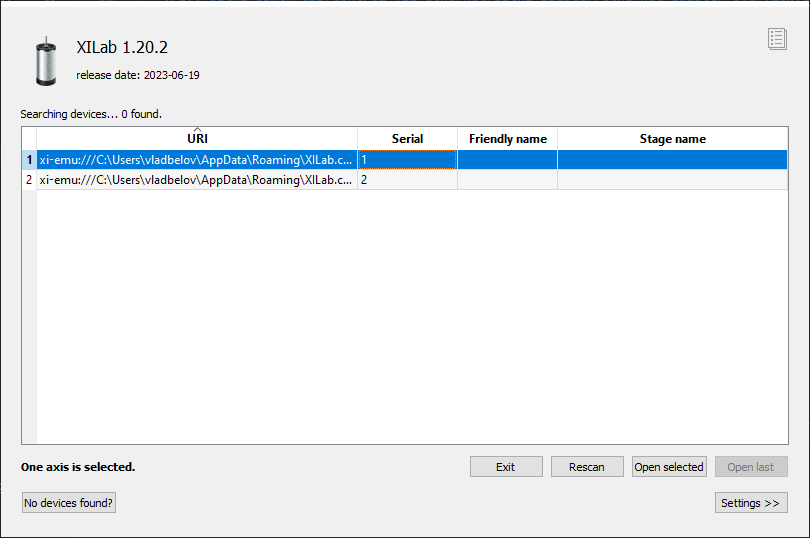
At first start, XILab opens controller detection window with two virtual devices.
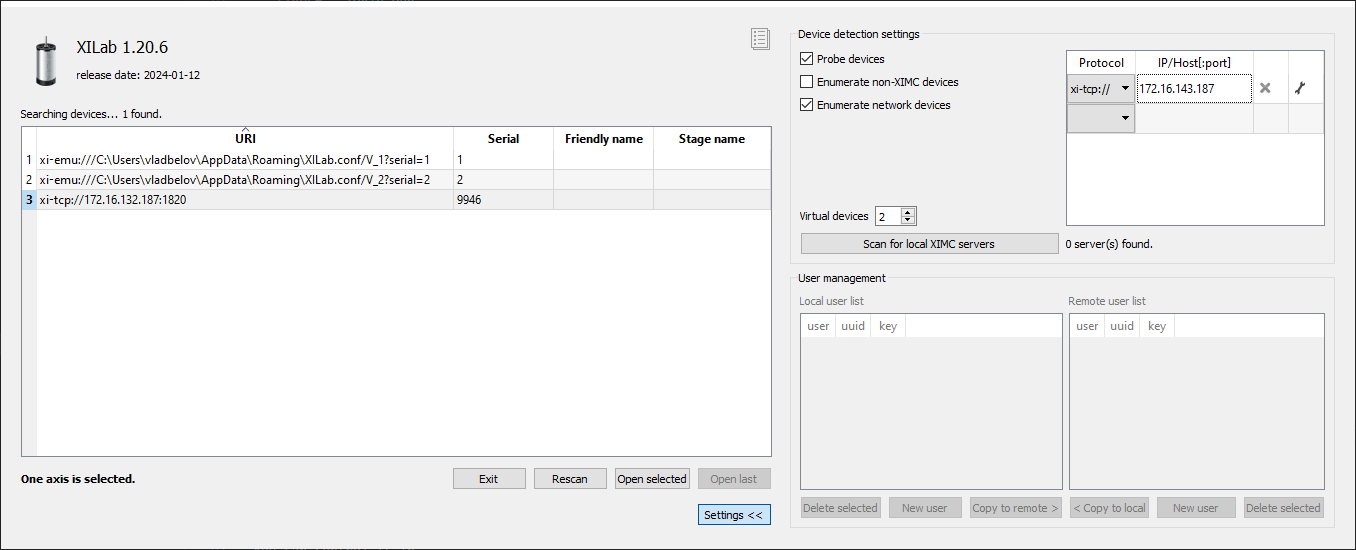
Click Settings, check Enumerate network devices in the right tab.
Select TCP protocol, enter the IP address of the 8SMC5 controller with Ethernet support.
Then click Rescan button in the left tap, XILab will find controller connected via Ethernet.
In controller detection window choose an axis you need. You can control it in single-axis mode or in multi-axis mode if more than one axis was chosen. For additional information please refer to Getting started with XILab software and XILab application User’s guide.
