7.2. Serial to Ethernet converter
7.2.1. General information
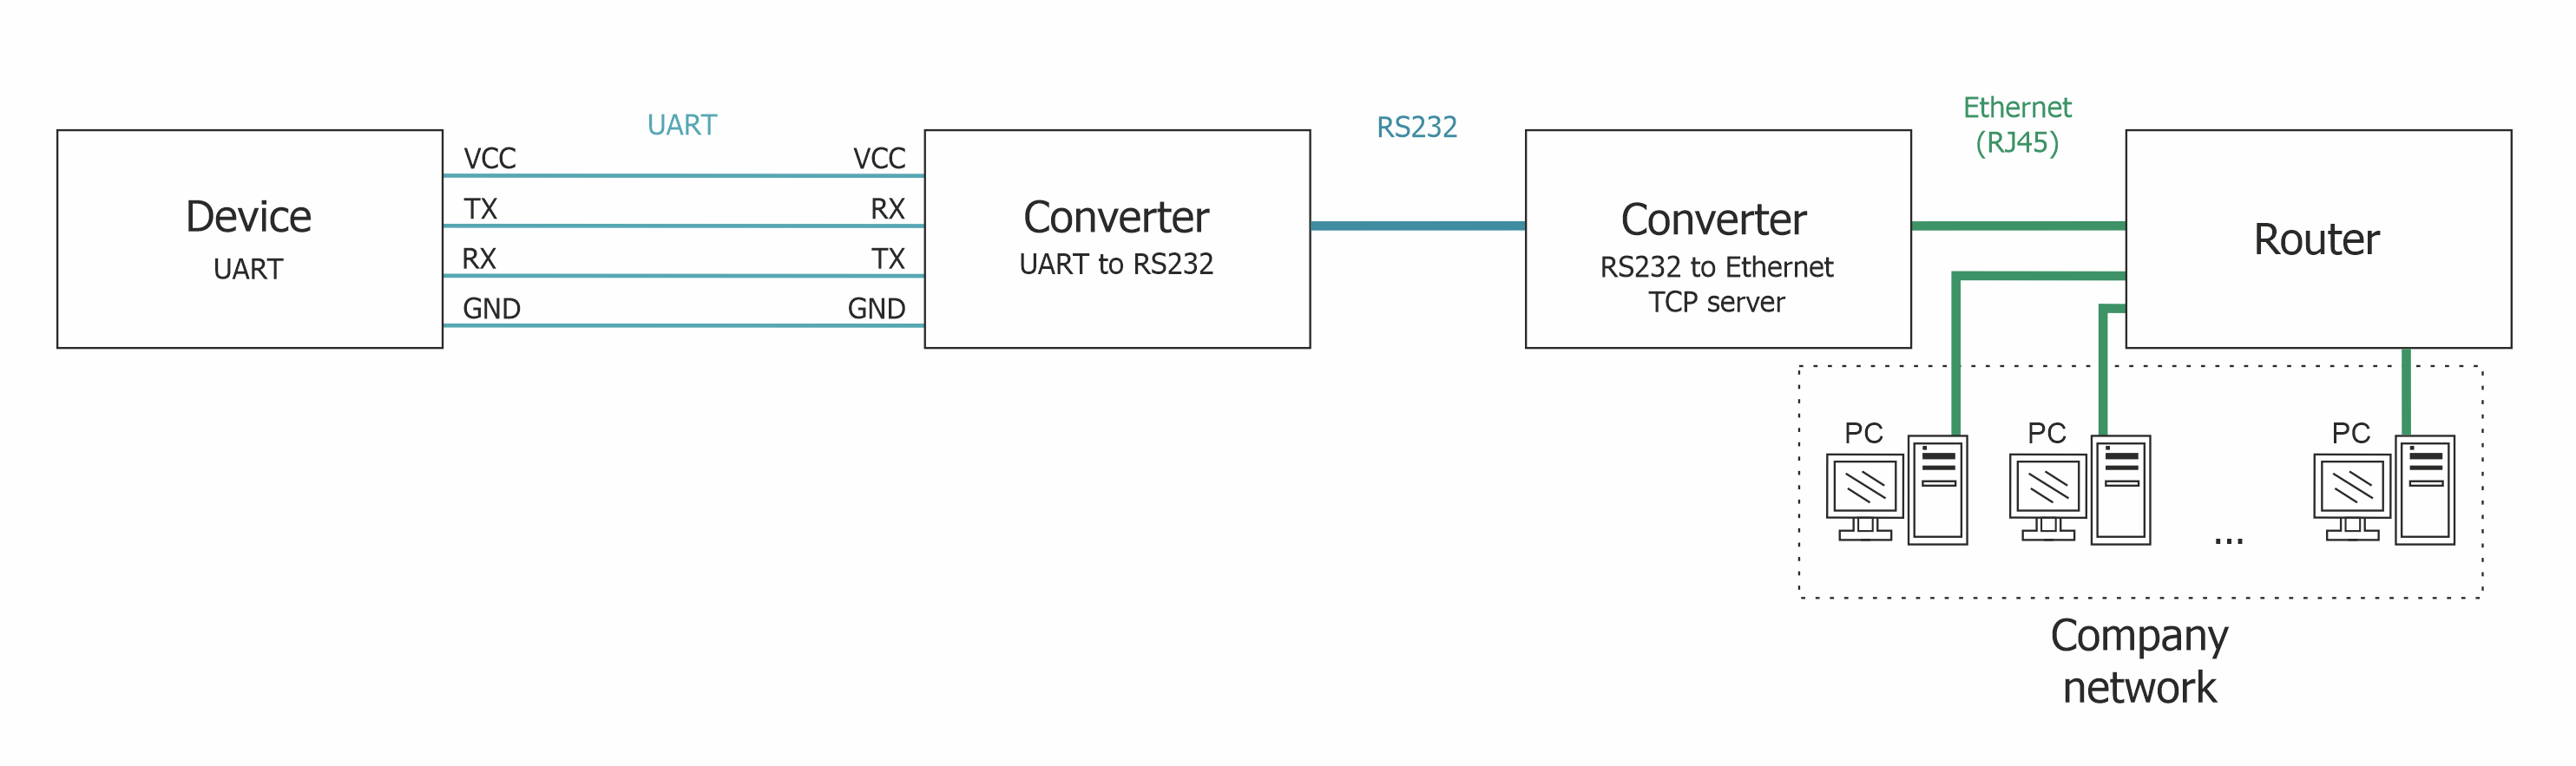
Sometimes there is a need to control the device via the serial port, and it is not always convenient to place the computer next to the device, and sometimes it is simply impossible. And then various Serial to Ethernet converters come to the rescue. Serial to Ethernet converters is designed so that devices having a serial connection type, when connected to it, are converted into network and are open for access from anywhere on the network. In addition, the function of multi-user access to a single device appears.
You can use any Serial to Ethernet converter, from the cheapest to the most expensive. For example, USR-TCP232-410s, USR-TCP232-302, ER108-R4U2, ER108-L4U2, NCOM-111-M, NCOM-211-M, NPort 5130, NPort 5110 and so on. In this chapter, the MOXA Nport 5110 converte will be used as a Serial to Ethernet converter.
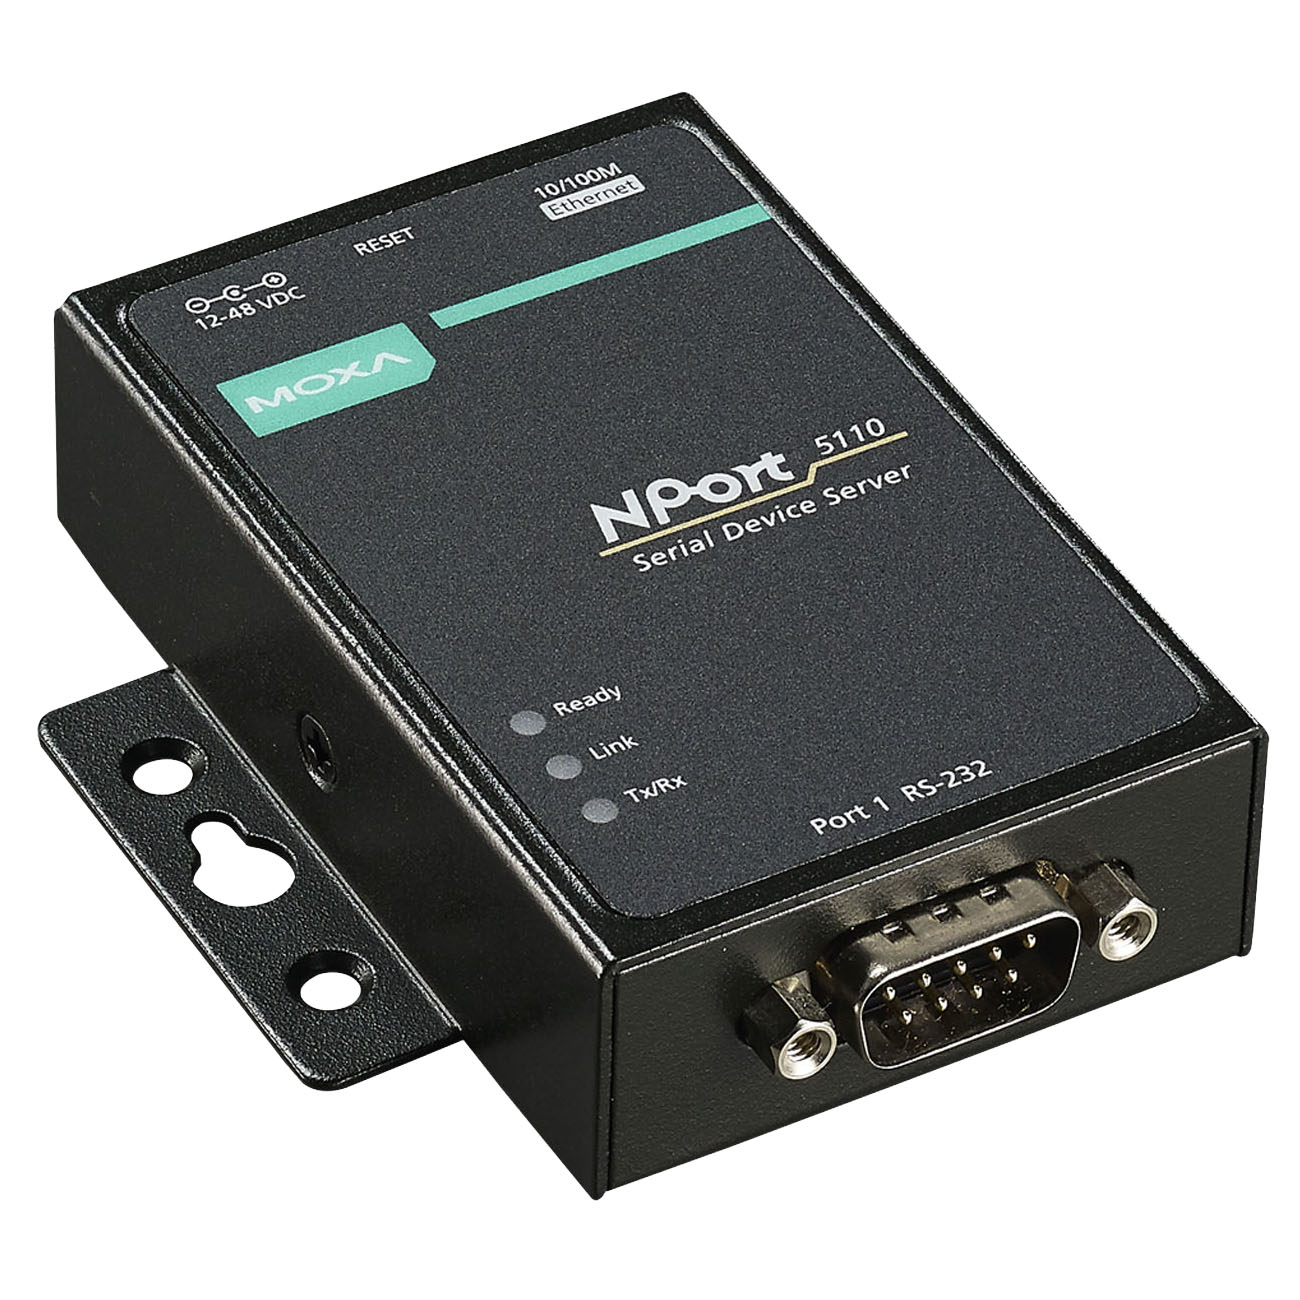
Outward appearance of MOXA converter
7.2.2. Connecting converter to the 8SMC5 controller
Configuration example
To create such a scheme, in our example, an 8SMC5-USB controller (without a case), a UART to RS232 converter (Waveshare RS232) and an RS232 to Ethernet converter with a TCP server (MOXA Nport 5110) will be used. The full real scheme will look like this:
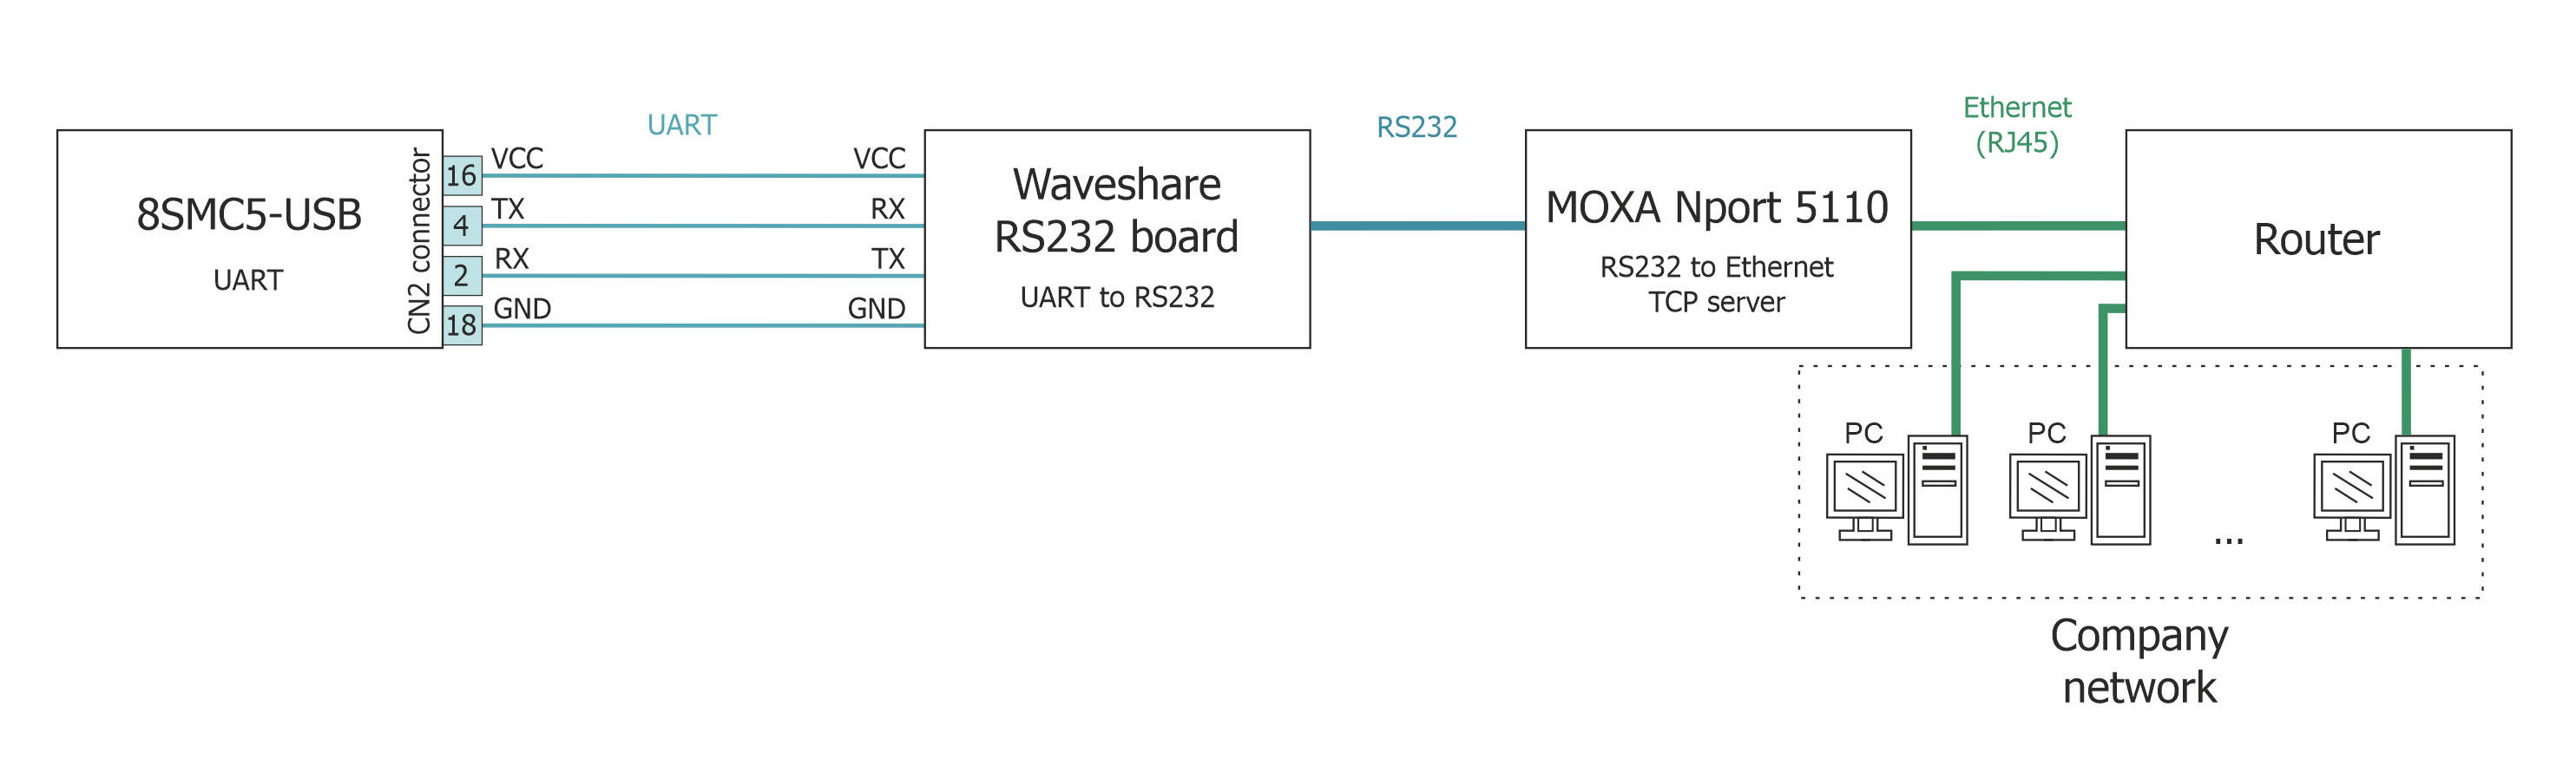
Real configuration scheme
- Connect the Waveshare RS232 board to the 8SMC5-USB controller according to the following scheme:
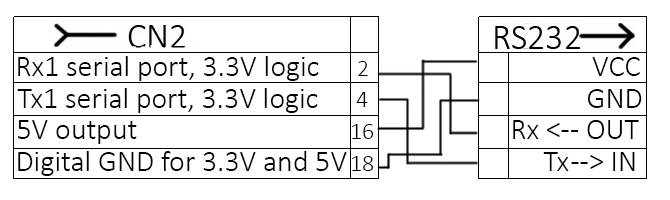
Connecting scheme Waveshare RS232 to the 8SMC5 controller
If you are using a controller 8SMC5-USB-B8-1 or 8SMC5-USB-B9-2, you will also need the RX, TX, 5V and GND pins, but already taken from the HDB-26 connector.
Important
For the scheme from this instruction the Rx and Tx lines must be connected as shown in the scheme above. Rx -> Rx, Tx -> Tx.
If you use another UART to RS232 converter the Rx and Tx lines may be connected in a different way, for example Rx ->Tx, Tx -> Rx.
- Connect the Waveshare RS232 board to the MOXA Nport 5110 converter using the DB9 connector
- Connect the Ethernet cable and the power supply that comes with the MOXA Nport 5110
- Connect the power supply and the stage to the 8SMC5-USB controller
- Turn on the 8SMC5-USB controller and the MOXA Nport 5110 converter
7.2.3. Configuring the MOXA NPort 5110 converter via the web interface
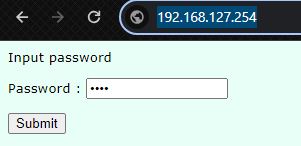
- In the web browser, enter 192.168.127.254 in the address bar (the default IP address of the MOXA NPort 5110 device). Enter the password to access the device.
Hint
The default password is “moxa”
- In the Network Settings section, specify the IP address, mask and gateway in accordance with the parameters of your local network.
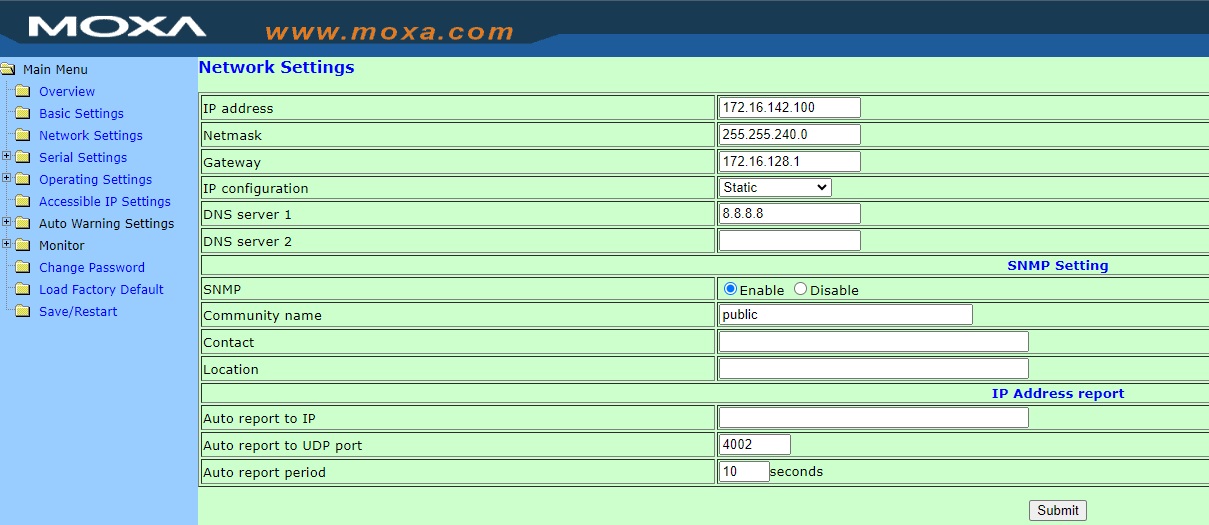
After making any changes to the converter settings, you need to save and restart the device!
Important
Please note that you will now need to enter the new IP address of the MOXA NPort 5110 device in the web browser.
- In the Operating Settings section, select the TCP Server Mode operation mode.
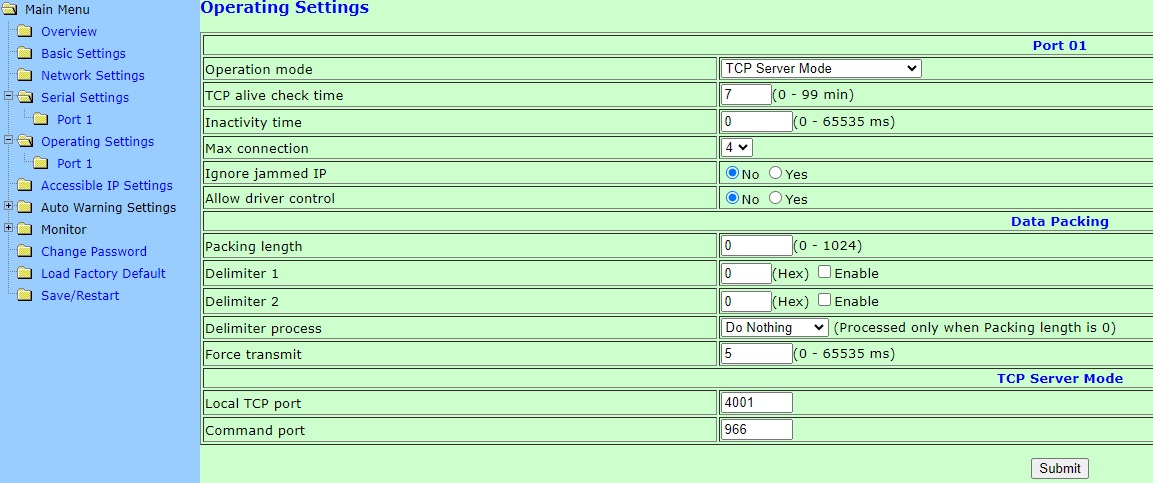
Do not forget to specify the Local TCP port through which the connection will be established.

7.2.4. Getting started with XILab
Launch XiLab and make the following. It is assumed that the above connection and configuration instructions have been followed.
At first start, XiLab opens controller detection window with two virtual devices.

Click Settings, check Enumerate network devices in the right tab. Select TCP protocol, enter the IP address of the MOXA converter and do not forget to specify the port. Then click Rescan button in the left tap, XILab will find controller connected to the converter.
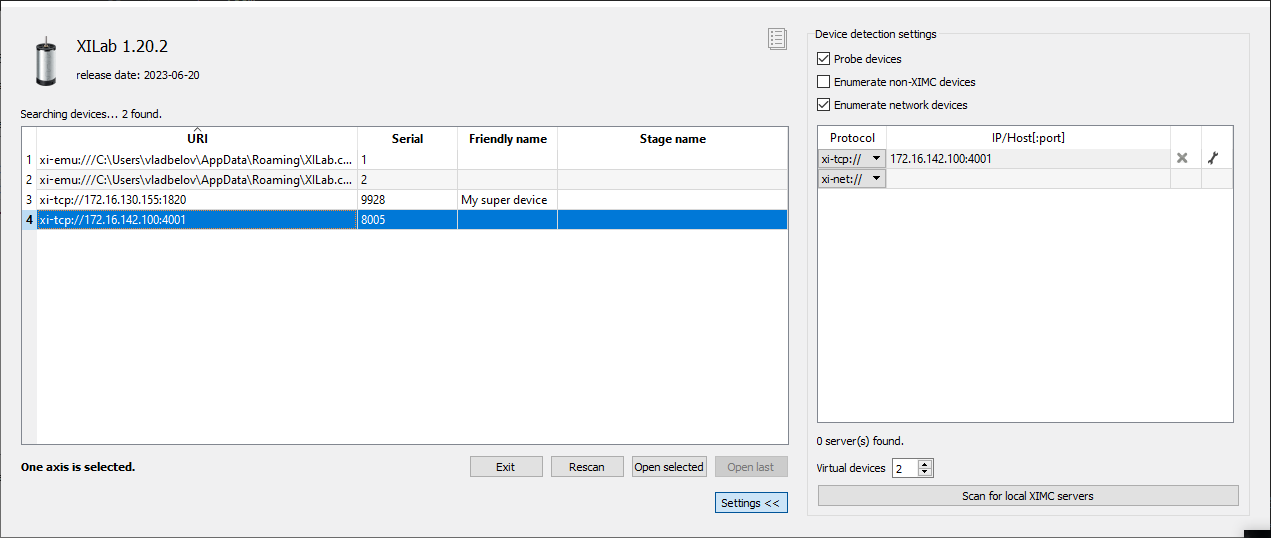
In controller detection window choose an axis you need. You can control it in single-axis mode or in multi-axis mode if more than one axis was chosen. For additional information please refer to Getting started with XILab software and XILab application User’s guide.
Note
Once the device IP address has been found, it should be understood that moving the device to another location may lead to a change in its IP.