7.1.2. Administration
Note
The 8SMC4-USB-Eth adapter has been renamed 8Eth1 [1]. All available instructions in our manual are relevant and applicable to both devices.
7.1.2.1. Connecting the device
7.1.2.1.1. Connecting the adapter to a PC
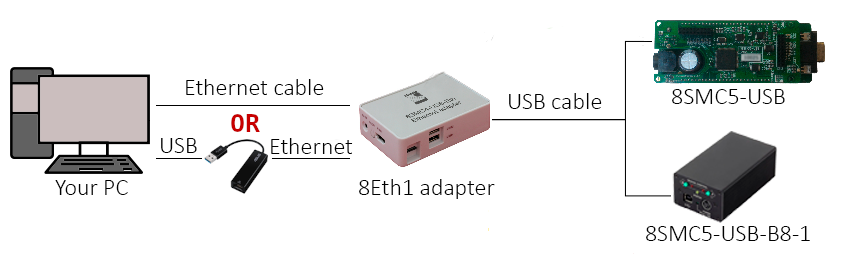
The adapter is connected directly to the computer.
Connect the power source 5 V cable to the 8Eth1 adapter and wait for 1 minute for the device to boot up.
Connect the 8Eth1 adapter to your computer using an Ethernet cable directly or use an additional USB to Ethernet adapter (if all network interfaces of the PC are already taken). The connection can be established in one of the following ways:
- Download and run a local DHCP server on the PC according to its instructions - the 8Eth1 will receive an IP address automatically.
- Assign a static IP address to the 8Eth1 adapter and make sure the PC is in the same subnet.
To establish a connection, choose one of the following options:
- Download and run a local DHCP server on the PC - the 8Eth1 will receive an IP address automatically.
- Assign a static IP address to the 8Eth1 adapter and make sure the PC is in the same subnet.
Check that the LEDs on the network connector of 8Eth1 device are blinking.
Open Revealer and click “Search”. A new device in the list should appear. Click on its URL to open it in the web browser.
If a new device didn’t appear, the situation needs additional troubleshooting - refer to FAQ.
7.1.2.1.2. Connecting the adapter to a network
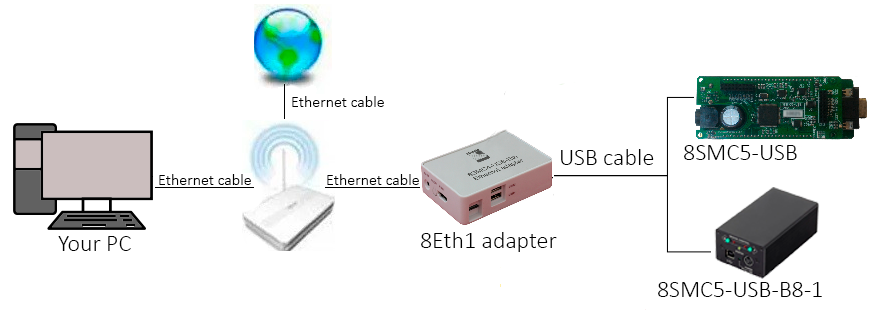
The adapter is connected to a router or a network switch.
The computer has Internet connection.
- Connect the power source 5 V cable to the 8Eth1 adapter and wait for 1 minute for the device to boot up.
- Connect the 8Eth1 adapter using an Ethernet cable to the network connector of a router or a network switch that also connects the PC to the common network.
- Check that the LEDs on the network connector of 8Eth1 device are blinking.
- Open Revealer and click “Search”. A new device in the list should appear. Click on its URL to open it in the web browser.
- If a new device didn’t appear, the situation needs additional troubleshooting - refer to FAQ.
Important
The 8Eth1 adapter and Revealer use multicast UDP and SSDP broadcasts. In some rare cases, the network or PC firewalls are configured to block those protocols for sequrity reasons, which denies the connection to the device. Having an empty list of devices in the “Revealer” after a search attempt may be a sign of such problem (usually, at least a couple of network devices, like printers or servers, should be visible). Consult your network manager and make sure that Port 49150 and the aforementioned UDP and SSDP protocols are not blocked!
7.1.2.2. Automatic device detection
“Revealer” is a convenient cross-platform utility for searching devices on a local network. You can download the utility from the software page.
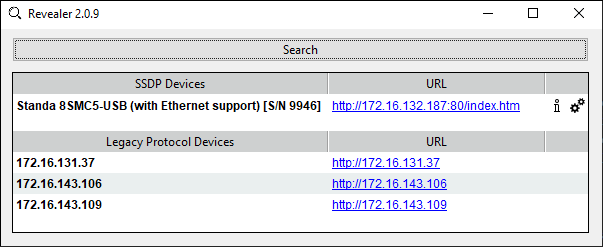
“Revealer” utility interface
The Graphical User Interface of the “Revealer” is a simple one. In order to start search click Search button - the scan takes approximately 3 seconds. After that all Standa 8Eth1 devices found in your local network will be listed on Legacy Protocol Devices panel as clickable links. When clicked, the link opens your defaul system browser and redirects it to Administartion interface web page.
Warning
“Revealer” uses UDP and SSDP broadcasts. When you click on the Search button, both broadcasts are used. For example:
To search Standa 8Eth1 adapter in your LAN UDP broadcasts are used. To search other devices, such as printers, MFU,
network drives, video cameras, etc. uses SSDP broadcasts. You can read more
about SSDP here.
It is important to note that “Revealer” might be unusable in the environments where UDP/SSDP broadcasts are forbidden or unwanted.
7.1.2.3. Overview
Standa 8Eth1 and Multi-Axis Motion Controller 8SMC4-ETHERNET/RS232-B19 devices is equipped with web-based Administration interface which enables the end user to control devices services and monitor system state.
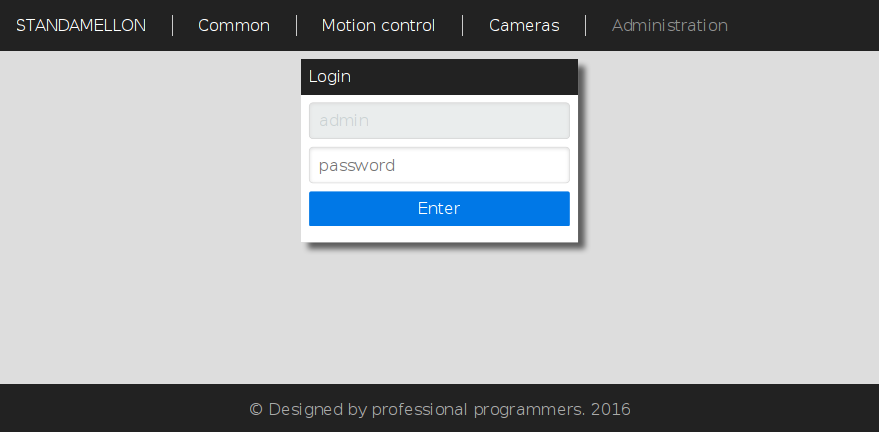
Administration interface login page
In order to get access to the Administration panel, navigate your browser to http://[address] URL (where [address] should be replaced with IP address of the device in your local network and can be obtained with the help of “Revealer” utility). If you are doing this for the first time (or you’ve disabled cookies/password storage in your browser) you’ll need to authenticate yourself.
Hint
Use “admin” as login and password
Administration interface is split into three functional sections.
7.1.2.3.1. “Common” section
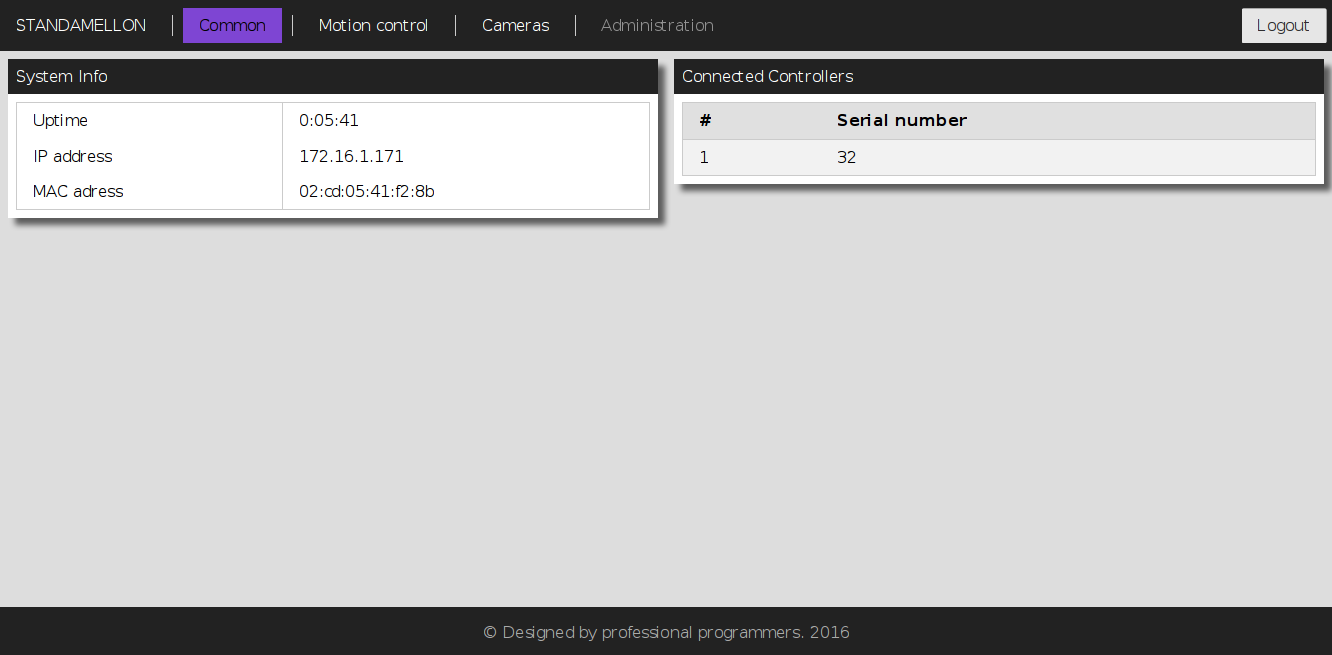
Common section page
This section contains generic system information and decimal serial numbers of all controllers connected to the device.
7.1.2.3.2. “Motion control” section
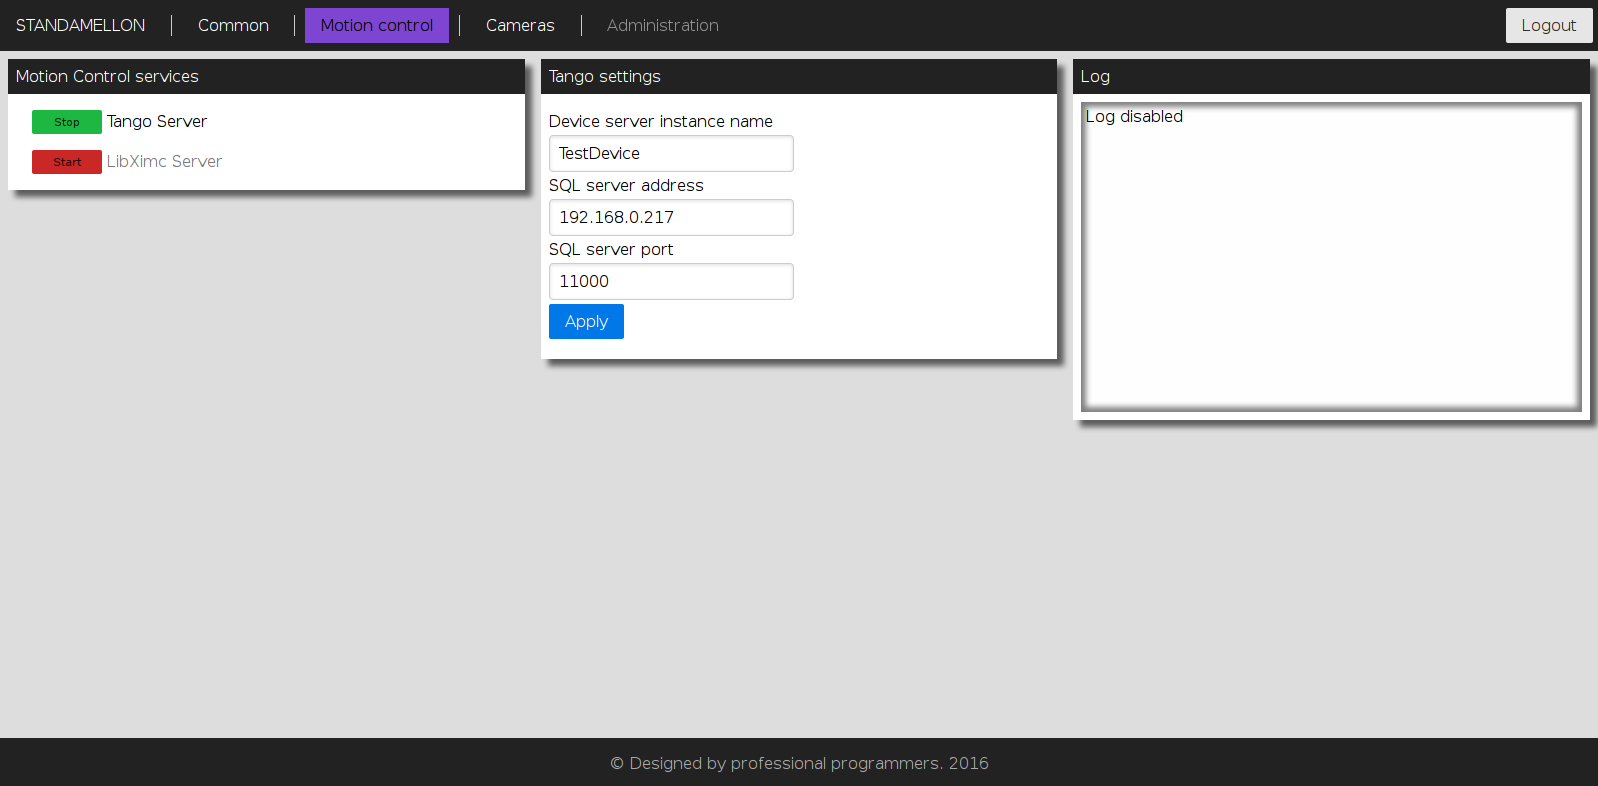
Motion control section page
This section is dedicated to motion control services supported by the device. “Motion Control services” panel contains a list of all currently available motion control services. Clicking on services’ title opens an appropriate settings panel (or none if service has no alterable settings). Clicking “Apply” button in settings panel will persist settings in database and restart corresponding service.
Note
Motion control services are mutually exclusive - only one can be active at any given moment. Starting one of the services will automatically stop previous active if any.
7.1.2.3.3. “Cameras” section
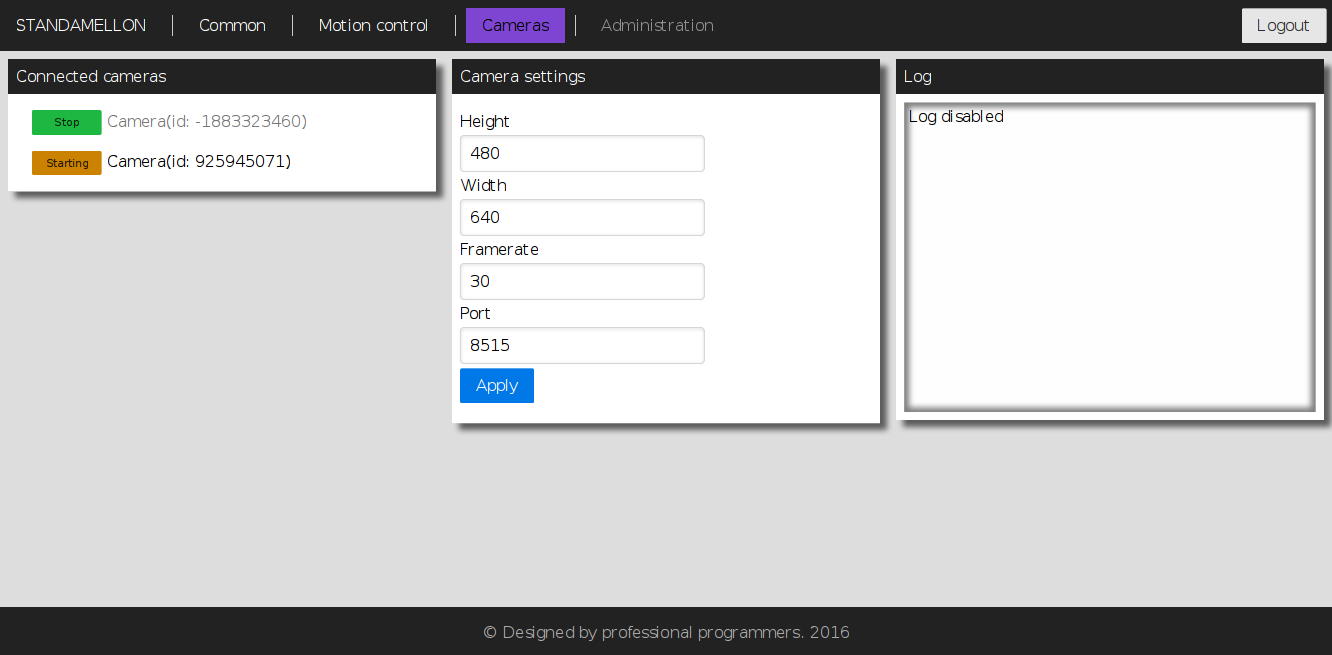
Cameras section page
In this section there is a list of all connected cameras. Each camera is associated with streaming server instance, which exposes settings, status indicators and controls.
7.1.2.4. Service control
The Administration panel enables you to control all available device services. There is a common management metaphor for all services independent of its’ actual functionality and aim. Each service has an associated Indicator button on the left of its title which shows current services’s status and enables changing it:
- Red color with “Stopped” label indicates that service is completely stopped; pressing the button will run service startup.
- Orange color with “Starting” label indicates that service is in interruptible start sequence; pressing the button will revert service to stopped state.
- Green color with “Stop” label shows that the service is up and running; pressing the button will trigger service stop sequence.
- Orange color with “Stopping” label indicates uninterruptible stop sequence.
Note
Many services have settings which can be altered. After changing any of such settings the corresponding process will be automatically restarted shortly - the Indicator button will show it dynamically.
7.1.2.5. Getting started with XILab
XILab is capable of interacting with remote controllers via Ethernet. You will need an 8Eth1 adapter with controllers connected to it. Launch XILab and make the following. At first start, XILab opens controller detection window with two virtual devices.
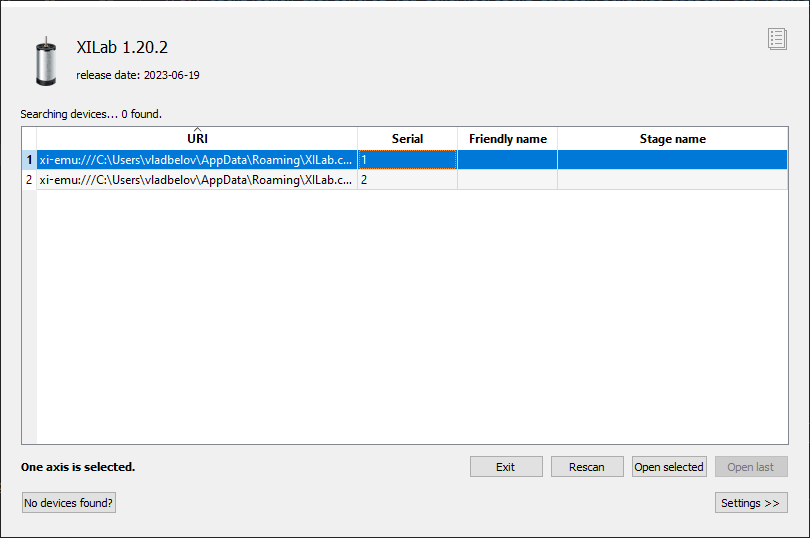
Click Settings, check Enumerate network devices in the right tab
and click Rescan button in the left tap, XILab will find all axis connected
to the system. XILab will use broadcast request to find available XIMC servers in your LAN.
You can also edit address list manually if desired.
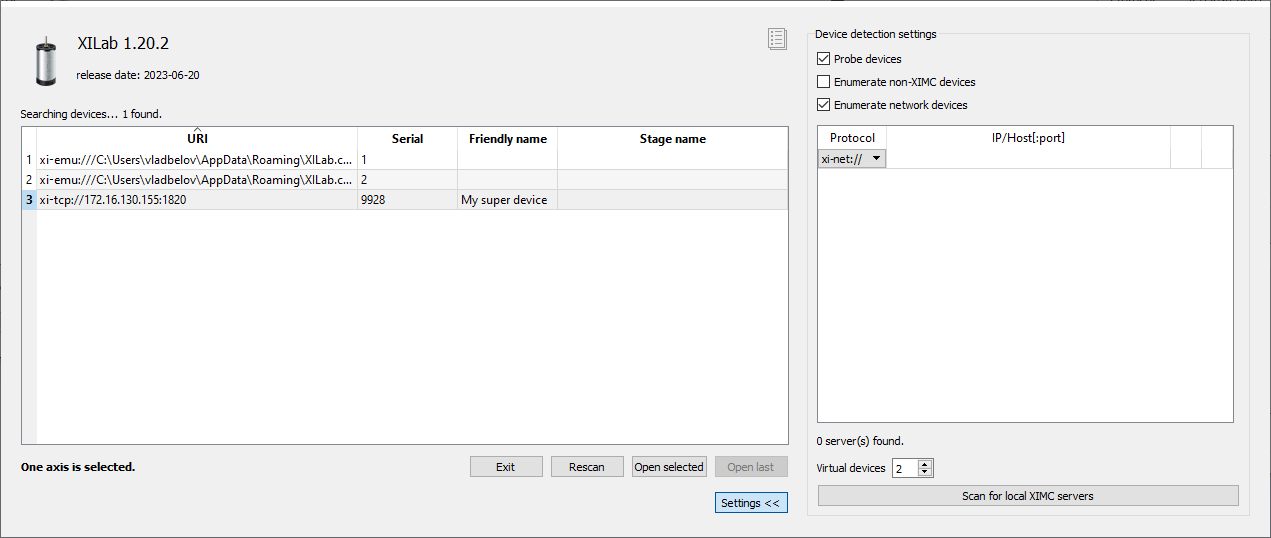
In controller detection window choose an axis you need. You can control it in single-axis mode or in multi-axis mode if more than one axis was chosen. For additional information please refer to Getting started with XILab software and XILab application User’s guide.
Note
Once the device IP address has been found, it should be understood that moving the device to another location may lead to a change in its IP.
Working with multiple adapters may cause a problem when the same board responds in a broadcast requests. You can find a new device by two different ways:
- Disconnect other 8Eth1 adapters, find the device on the network, connect all again.
- Press Rescan button until you find sought-for device.
7.1.2.6. Firmware upgrade
- To update the firmware of the 8Eth1 adapter, you will need a microSD of 4 GB (or more). You can use the microSD card already installed in the device.
Note
It is expected that for the microSD taken from the device Windows may generate a warning that it couldn’t detect the filesystem and that the drive needs a format operation. No further actions are needed.
- Preparing a microSD card
Remove the microSD card from the 8Eth1 adapter
Connect the card to your computer via a card reader
- Use the program to record the image:
- Windows family OS
- Download Win32 Disk Imager (official site) and start it
- Specify autoinstaller image path in “Image File” field
- Select your MicroSD drive in “Device” list
- Press “Write” button and wait till progressbar completes
- Unix family OS
You can do it via dd utility but remember to substitute the device names with yours)
dd if=autoinstall_image_2015-12-17.bin of=/dev/sdX bs=4M; sync
- Windows family OS
Insert the microSD card with the image into your 8Eth1 and turn it on. Now you should have your 8Eth1 device updated and fully operational.
| [1] | The vendor code was changed in 2020, earlier this product had the vendor code 8SMC4-USB-Eth. |