4.7.1. MicroManager
4.7.1.1. Preparation
Important
This guide for MicroManager was developed and tested on version 2.0-gamma. The guide for earlier versions can be found on the Internet.
- Download and install MicroManager. This is a simple procedure, and there are usually no problems with the setup process.
- Download the libximc-2.7.6 library distribution
Warning
MicroManager will only work with the libximc library version-2.7.6. It will not work with any other libximc version!
- Copy following DLLs from extracted directory
ximc-2.7.6/ximc/winX/ to the MicroManager directory:
libximc.dll, xiwrapper.dll, bindy.dll.
The bitrate of the copied libraries must match the bitrate of the installed MicroManager. - Install VC++ 2013 Redistributable Package from the extracted file
ximc-2.7.6/ximc/winX/vcredist.exe
The bitrate of “vcredist” must match the bitrate of your OS. - Connect a power supply to controllers and set the appropriate voltage for motors in your stage. Turn on a power supply.
- You need XiLab to check your controllers controllers and set it. XiLab version depends on the controller firmware version. You can download XiLab and update controller’s firmware at this page:
- Connect controllers to computer via USB and open them in XiLab software. Click Load setting from profile… in Settings… window of XiLab and choose appropriate profile for your stage. Click Save settings to flash. For additional information visit: XILab application User’s guide.
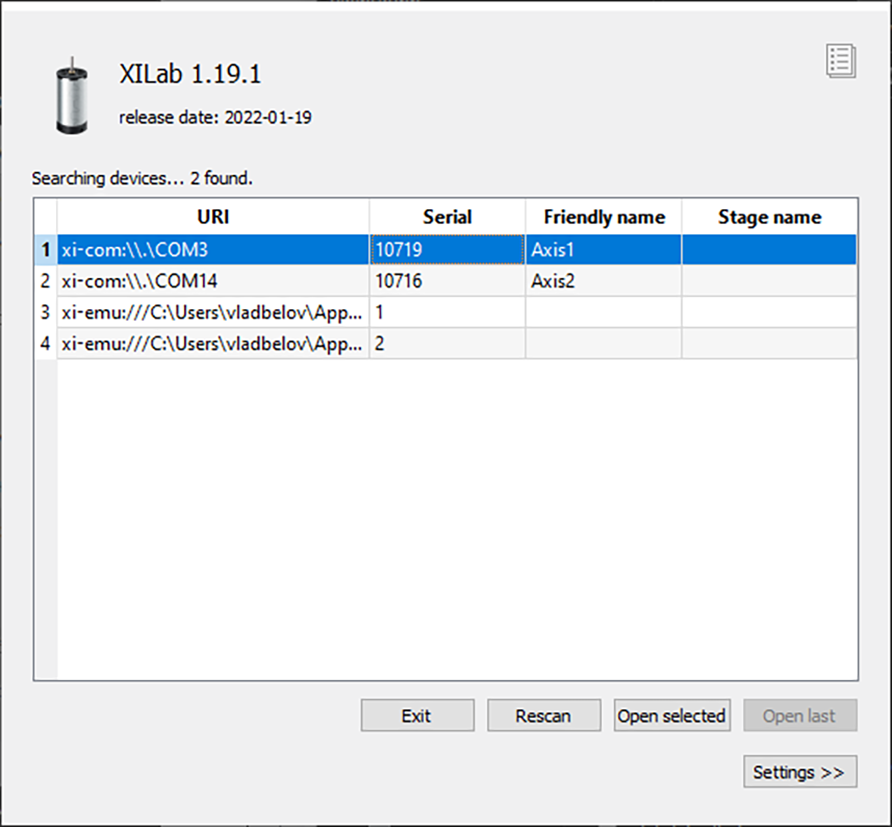
Example of controller discovery in xilab
4.7.1.2. Getting started with MicroManager
4.7.1.2.1. Run MicroManager
Note
When installing the MicroManager in C:\Program Files access to configuration files is limited and you need to have administrator privileges. To start an application as administrator right click by its icon and choose Run as administrator.
- Run MicroManager from the shortcut at your desktop or start ImageJ.exe application from installation directory. First time it will greet you and suggest to type some information about yourself.
- The next window contains drop-down list with configuration files. Choose None.
4.7.1.2.2. Configure hardware
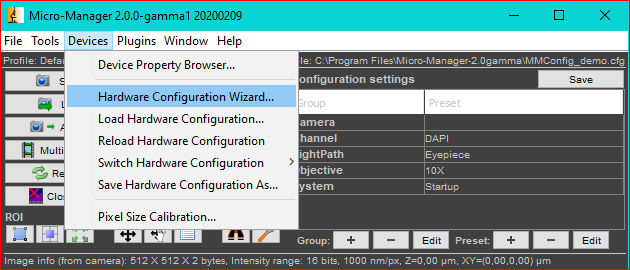
- In the main window choose Devices → Hardware configuration wizard.
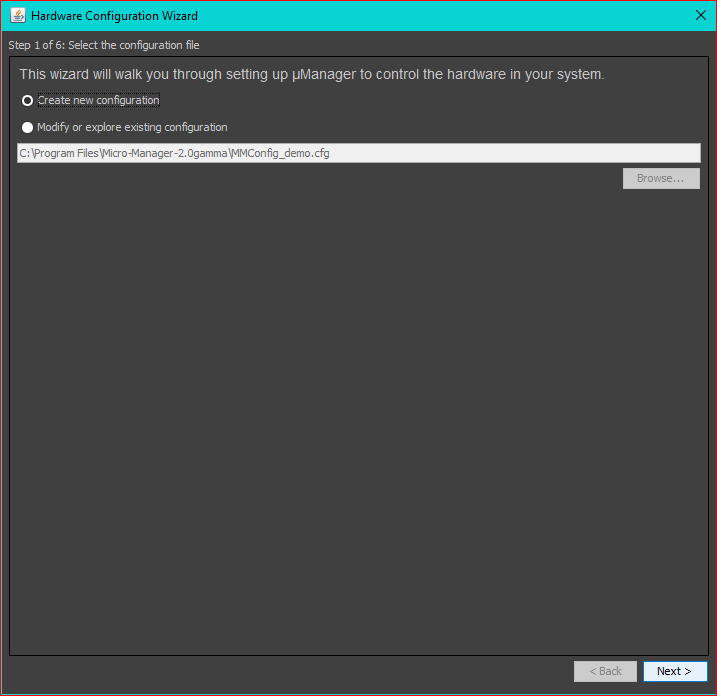
The process of hardware configuration consists of 6 steps:
- At start, choose “Create new configuration” and click “Next”.
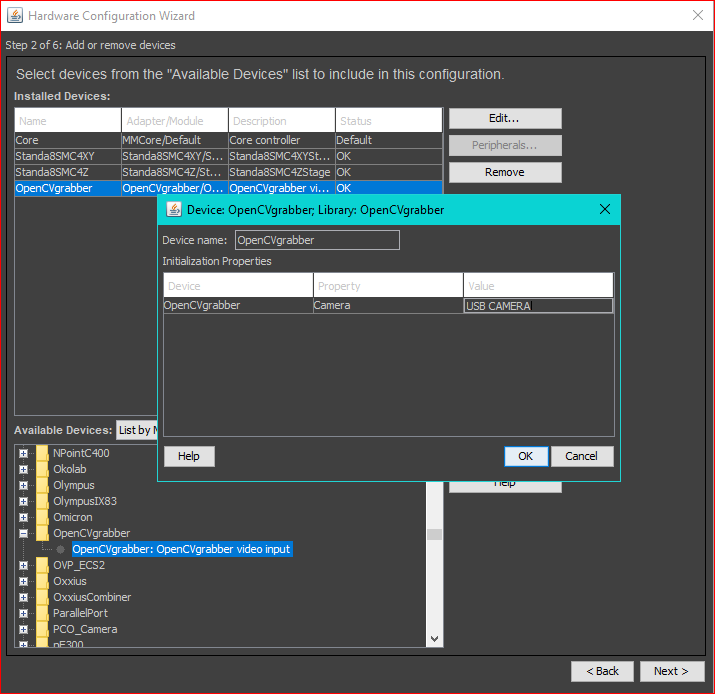
- At the second step MicroManager prompts you to add hardware. If you want to use MicroManager with 8SMC4/5-USB motor controller choose Standa8SMC4 folder in down window with available devices. There are two drivers: Standa8SMC4Z is for motor controller with one axis and Standa8SMC4XY is for controller with two axes. When you select one of them, a dialog box with properties will appear.

In the Value column type the COM port number for motor controller in the next format:
xi-com:%5C%5C.%5CCOMn
Trailing letter n is a number of corresponding COM port (look at the screenshot above). You can find it in XILab or in Device Manager → Ports. Click Ok. Unit Multiplier X/Y fields are leaved with default values. These values allow you to set stage speed.
For Standa8SMC4Z you should type COM port and Unit Multiplier too. Z axis is usually used as a focusing stage.
Camera is added in the same way. You need to know correct driver name for your camera. OpenCVGrabber driver may be used for any USB camera. Choose OpenCVGrabber folder in Available Devices. The next window will appear. Click Ok.
Click Next continue, choose where to save your config file. After click Finish in the last step.
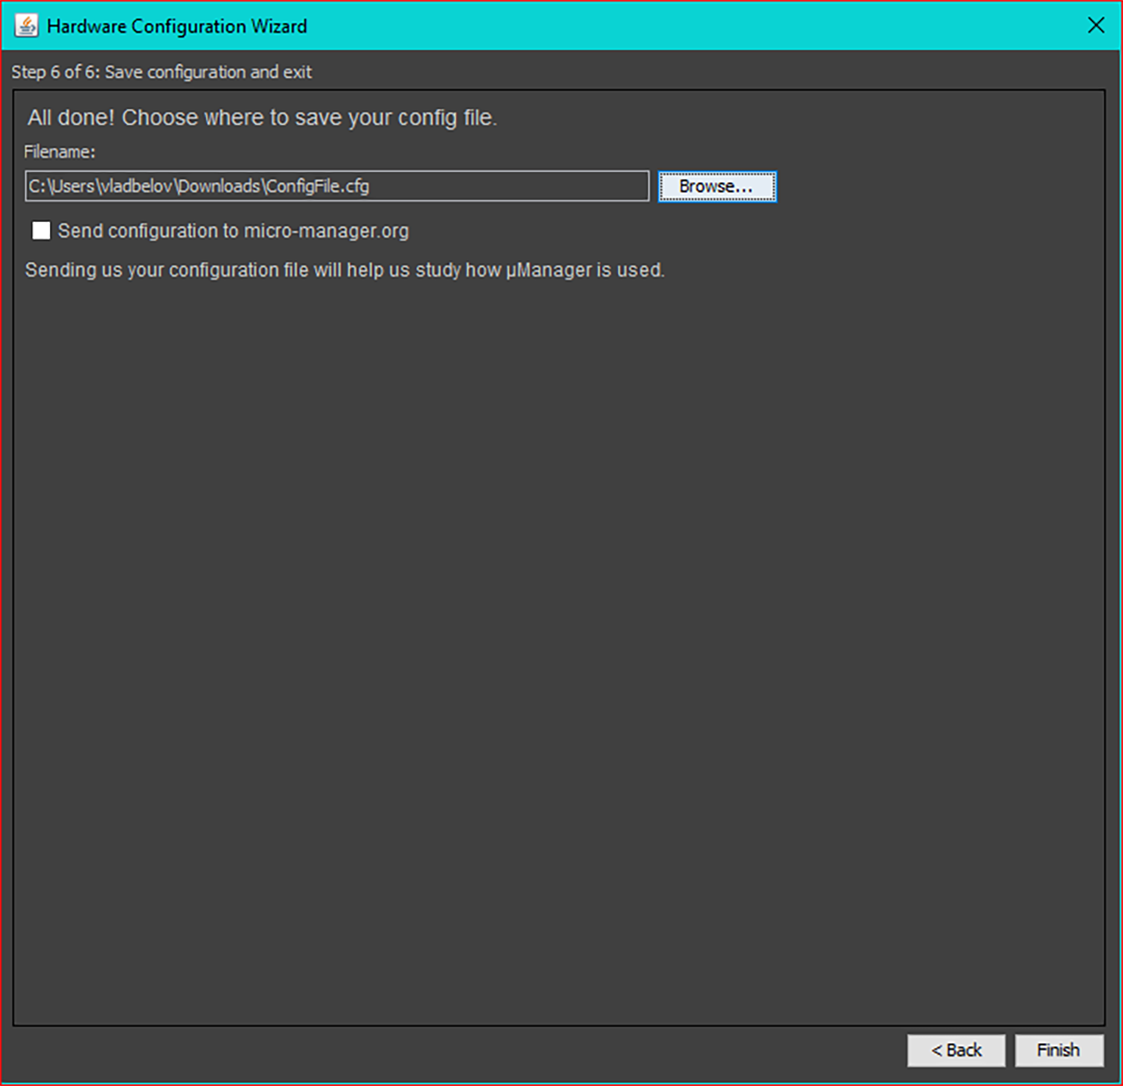
The system configuration is finished.
4.7.1.2.3. Device usage
We have installed and configured MicroManager and can check how does it work.
- Set the pixel size parameter in Devices → Pixel Size Calibration…. There are you should type the pixel size value and mark parameters that MicroManager should consider. Click New to create new pixel size. In appeared window mark resolution of your camera (with OpenCVGrabber it is OpenCVGrabber - Resolution parameter) and type pixel size (in um). If you want to calculate pixel size parameter you need to know image size from microscope, its resolution and displacement (from screw pitch) for you stage.
- Choose Devices -> Stage Position List…. Click Set Origin to set zero of your stage coordinate system. Then, in the main window click Live. Choose Scrolling Tool (like a hand) in the main window. Make sure that cursor looks like a hand on the screen. Click the windows with the video from camera. Now you can control your stage by keyboard (arrow keys to control XY axis and U,J buttons to control Z axis).
- You can scroll an image from a camera with the mouse cursor. Click Tools → Mouse Moves Stage (Use Hand Tool). Now click video window and drag it in the desired direction. Stage will move in the same direction. Double click will allow you to center the view on the chosen point in the image.
Note
For example you set the pixel size is equal to 1um. And UnitMultiplierX/Y is equals to 1.0000. With 8MTF stage table one pixel shift corresponds to 12.5um. If we will set UnitMultiplierX/Y to 12.5 than movement at one pixel will corresponds to 1um.
Note
You may decrease UnitMultiplier if the stage speed is low and increase it if the stage speed is very high.