4.7.2. TANGO
Note
The 8SMC4-USB-Eth adapter has been renamed 8Eth1 [1]. All available instructions in our manual are relevant and applicable to both devices.
4.7.2.1. Overview
Our controllers provide TANGO interface!
The TANGO control system is a free open source device-oriented controls toolkit for managing any kind of hardware or software and building SCADA systems. It is used for controlling synchrotrons, lasers, physics experiments in over 20 sites. It is being actively developed by a consortium of research institutes.
TANGO is based on the concept of Devices. Devices implement object oriented and service oriented approaches to software architecture. The Device model in TANGO implements commands/methods, attributes/data fields and properties for configuring Devices. In TANGO all control objects are Devices and hardware access is managed in a process called a Device Server.
The Device Server contains Devices belonging to different Device Classes which implement the hardware access. At Device Server startup time Devices (instances of Device Classes) are created which then represent logical instances of hardware in the control system. Clients import the Devices via a TANGO Database Server and send requests to the devices using zeromq and CORBA protocols.
Standa 8SMC5-USB controllers are compatible with TANGO 8.1 system via custom device server implementation and can be used in two scenarios:
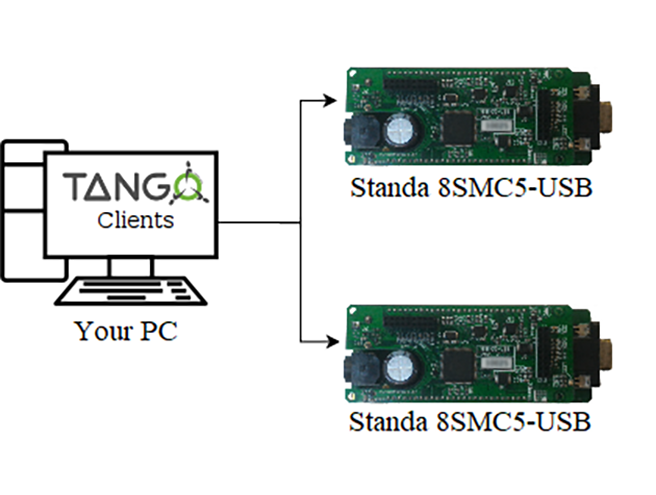
Using TANGO interface via device server directly on your PC
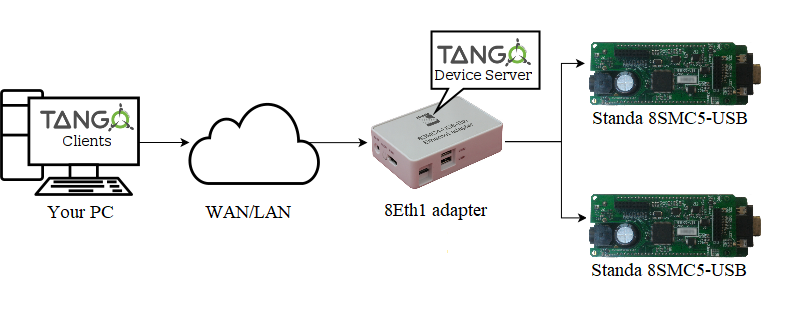
Using TANGO interface via Standa 8Eth1 adapter device
4.7.2.2. Declaring the device, configuring and starting device server
Warning
The device server for Standa 8SMC5-USB was developed and tested with TANGO 8.1 version. It should work with any TANGO version greater than or equal to 7 due to backward and forward compatibility in the API but hasn’t been verified yet.
First of all you should declare the device in your local TANGO Database Server. The easiest way to do it is via Jive:
Important
The video on setting up a new TANGO-compatible device shows the same steps as in the instructions below
Video guide to setting up a TANGO
Connect to your local TANGO control system (Edit -> Change Tango Host).
Start registration wizard (Tools -> Server Wizard).
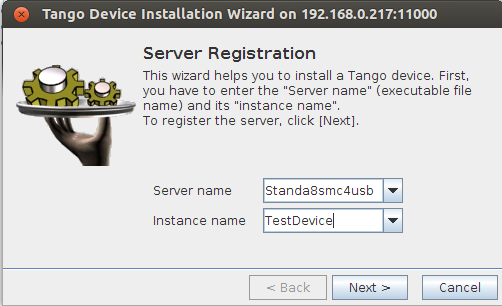
Jive server wizard dialog
Enter “Standa8smc4usb” in Server Name field. Instance name can be arbitrary word containing alphanumeric symbols only (e.g. “TestDevice”).
Press next - you should see Start the server window. Now it’s time to actually start the device server.
If you have Standa 8Eth1 and want to use its inbuilt TANGO support you should open administration interface and do configuration and/or perform startup from there.
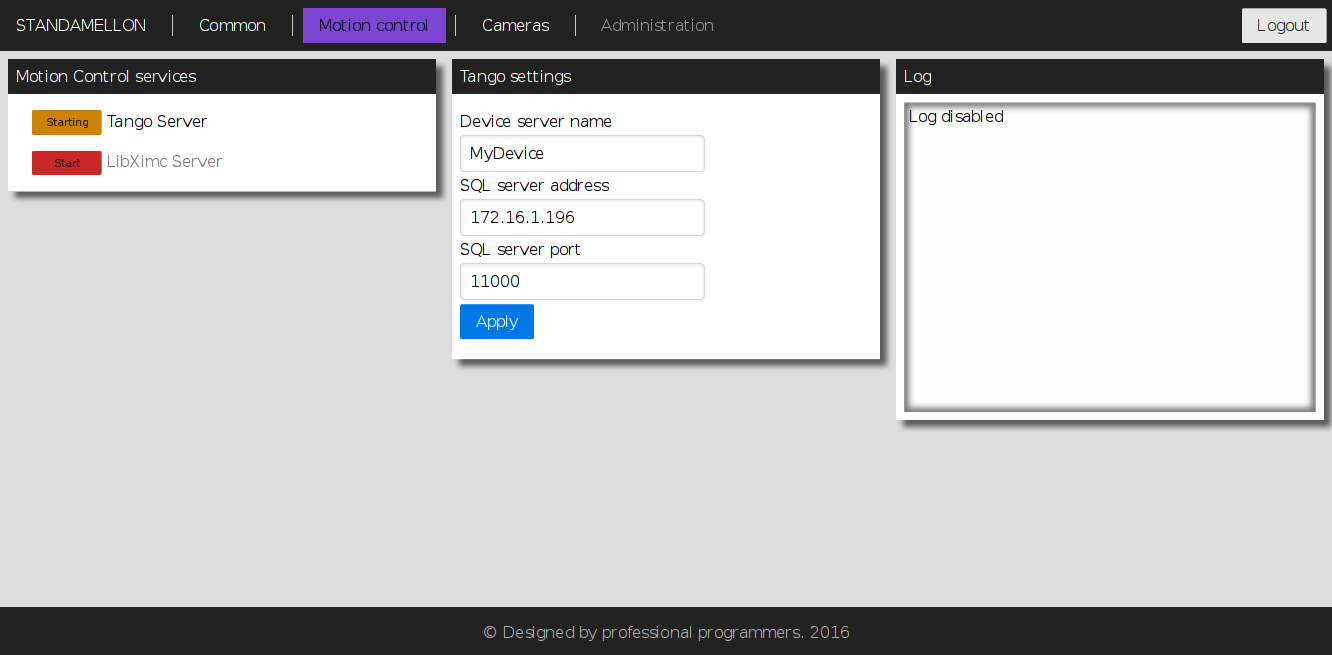
TANGO service configuration page in the administration interface
Otherwise if you’re going to use TANGO device server directly, you have to compile it for your target platform manually from the source. The resulting Standa8smc4usb executable should be started with previously entered in “Jive” instance name as its’ first argument (e.g. “TestDevice”). If everything is fine you’ll see Ready to accept requests in standard output stream.
Note
Device server instance name entered in Jive must match the name specified during device server instance startup (both manually via executable and from administration interface).
Note
Before starting “Standa8smc4usb” device server make sure that “TANGO_HOST” environment variable points to your local TANGO Database Server e.g. “192.168.0.172:11000”.
Go back to Jive Start the server window and press next button.
In the Class Selection window choose Standa8scm4usb class and press Declare device button.
Enter TANGO specification compliant Device name (e.g. “a/b/c”) and press next.
The next step requires entering SerialNumber. It can be obtained either from Common section in the administration interface if you’re using Standa 8Eth1 device, or via XiLab (Settings -> About Device -> Serial number).
Note
XiLab may also be used to obtain serial number of the controller connected to Standa 8Eth1 device but LibXimc motion control service has to be enabled in administration panel for this to work. For more information please refer to XILab documentation.
After that CalibrationRatio and CalibrationUnits parameters should be set. Theirs purpose is to replace internal controller coordinates with units familiar to the user and should be treated as “1 step = CalibrationRatio CalibrationUnits” formula. If you don’t need calibration, set these parameters to “1.0” and empty string respectively.
Device declaration procedure (previous 3 steps) should be repeated for each connected controller you want to access via TANGO interface.
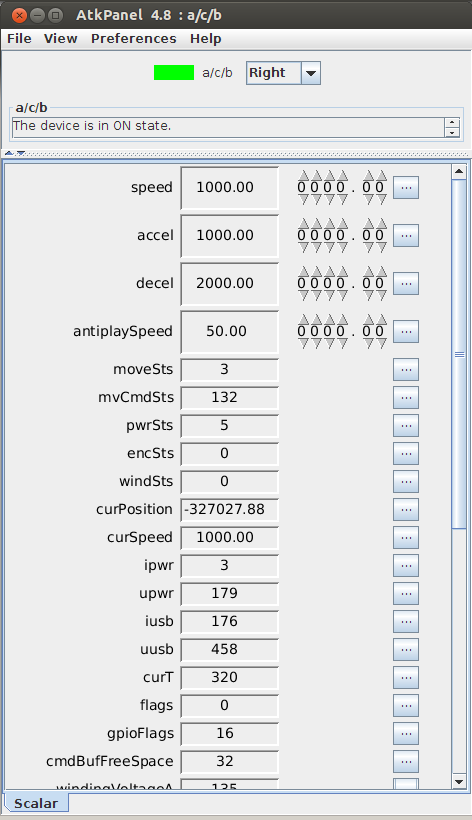
Default ATK panel for controller exposed via TANGO
After that any exported controller is available for configuration and control through TANGO interface making it blend seamlessly with your existing infrastructure! For more info please refer to official TANGO documentation.
| [1] | The vendor code was changed in 2020, earlier this product had the vendor code 8SMC4-USB-Eth. |